Build your own Hue Lights sensor
A few weeks ago I started playing with electronics. It was on a Hack Week at work, and we build a sensor for detecting when our pingpong table is free. You can read more about it in this post I wrote.
I have never played with electronics before, and I got completely hooked! It’s so fun to build stuff and see it working. After that Hack Week, I came out with a lot of ideas for projects.
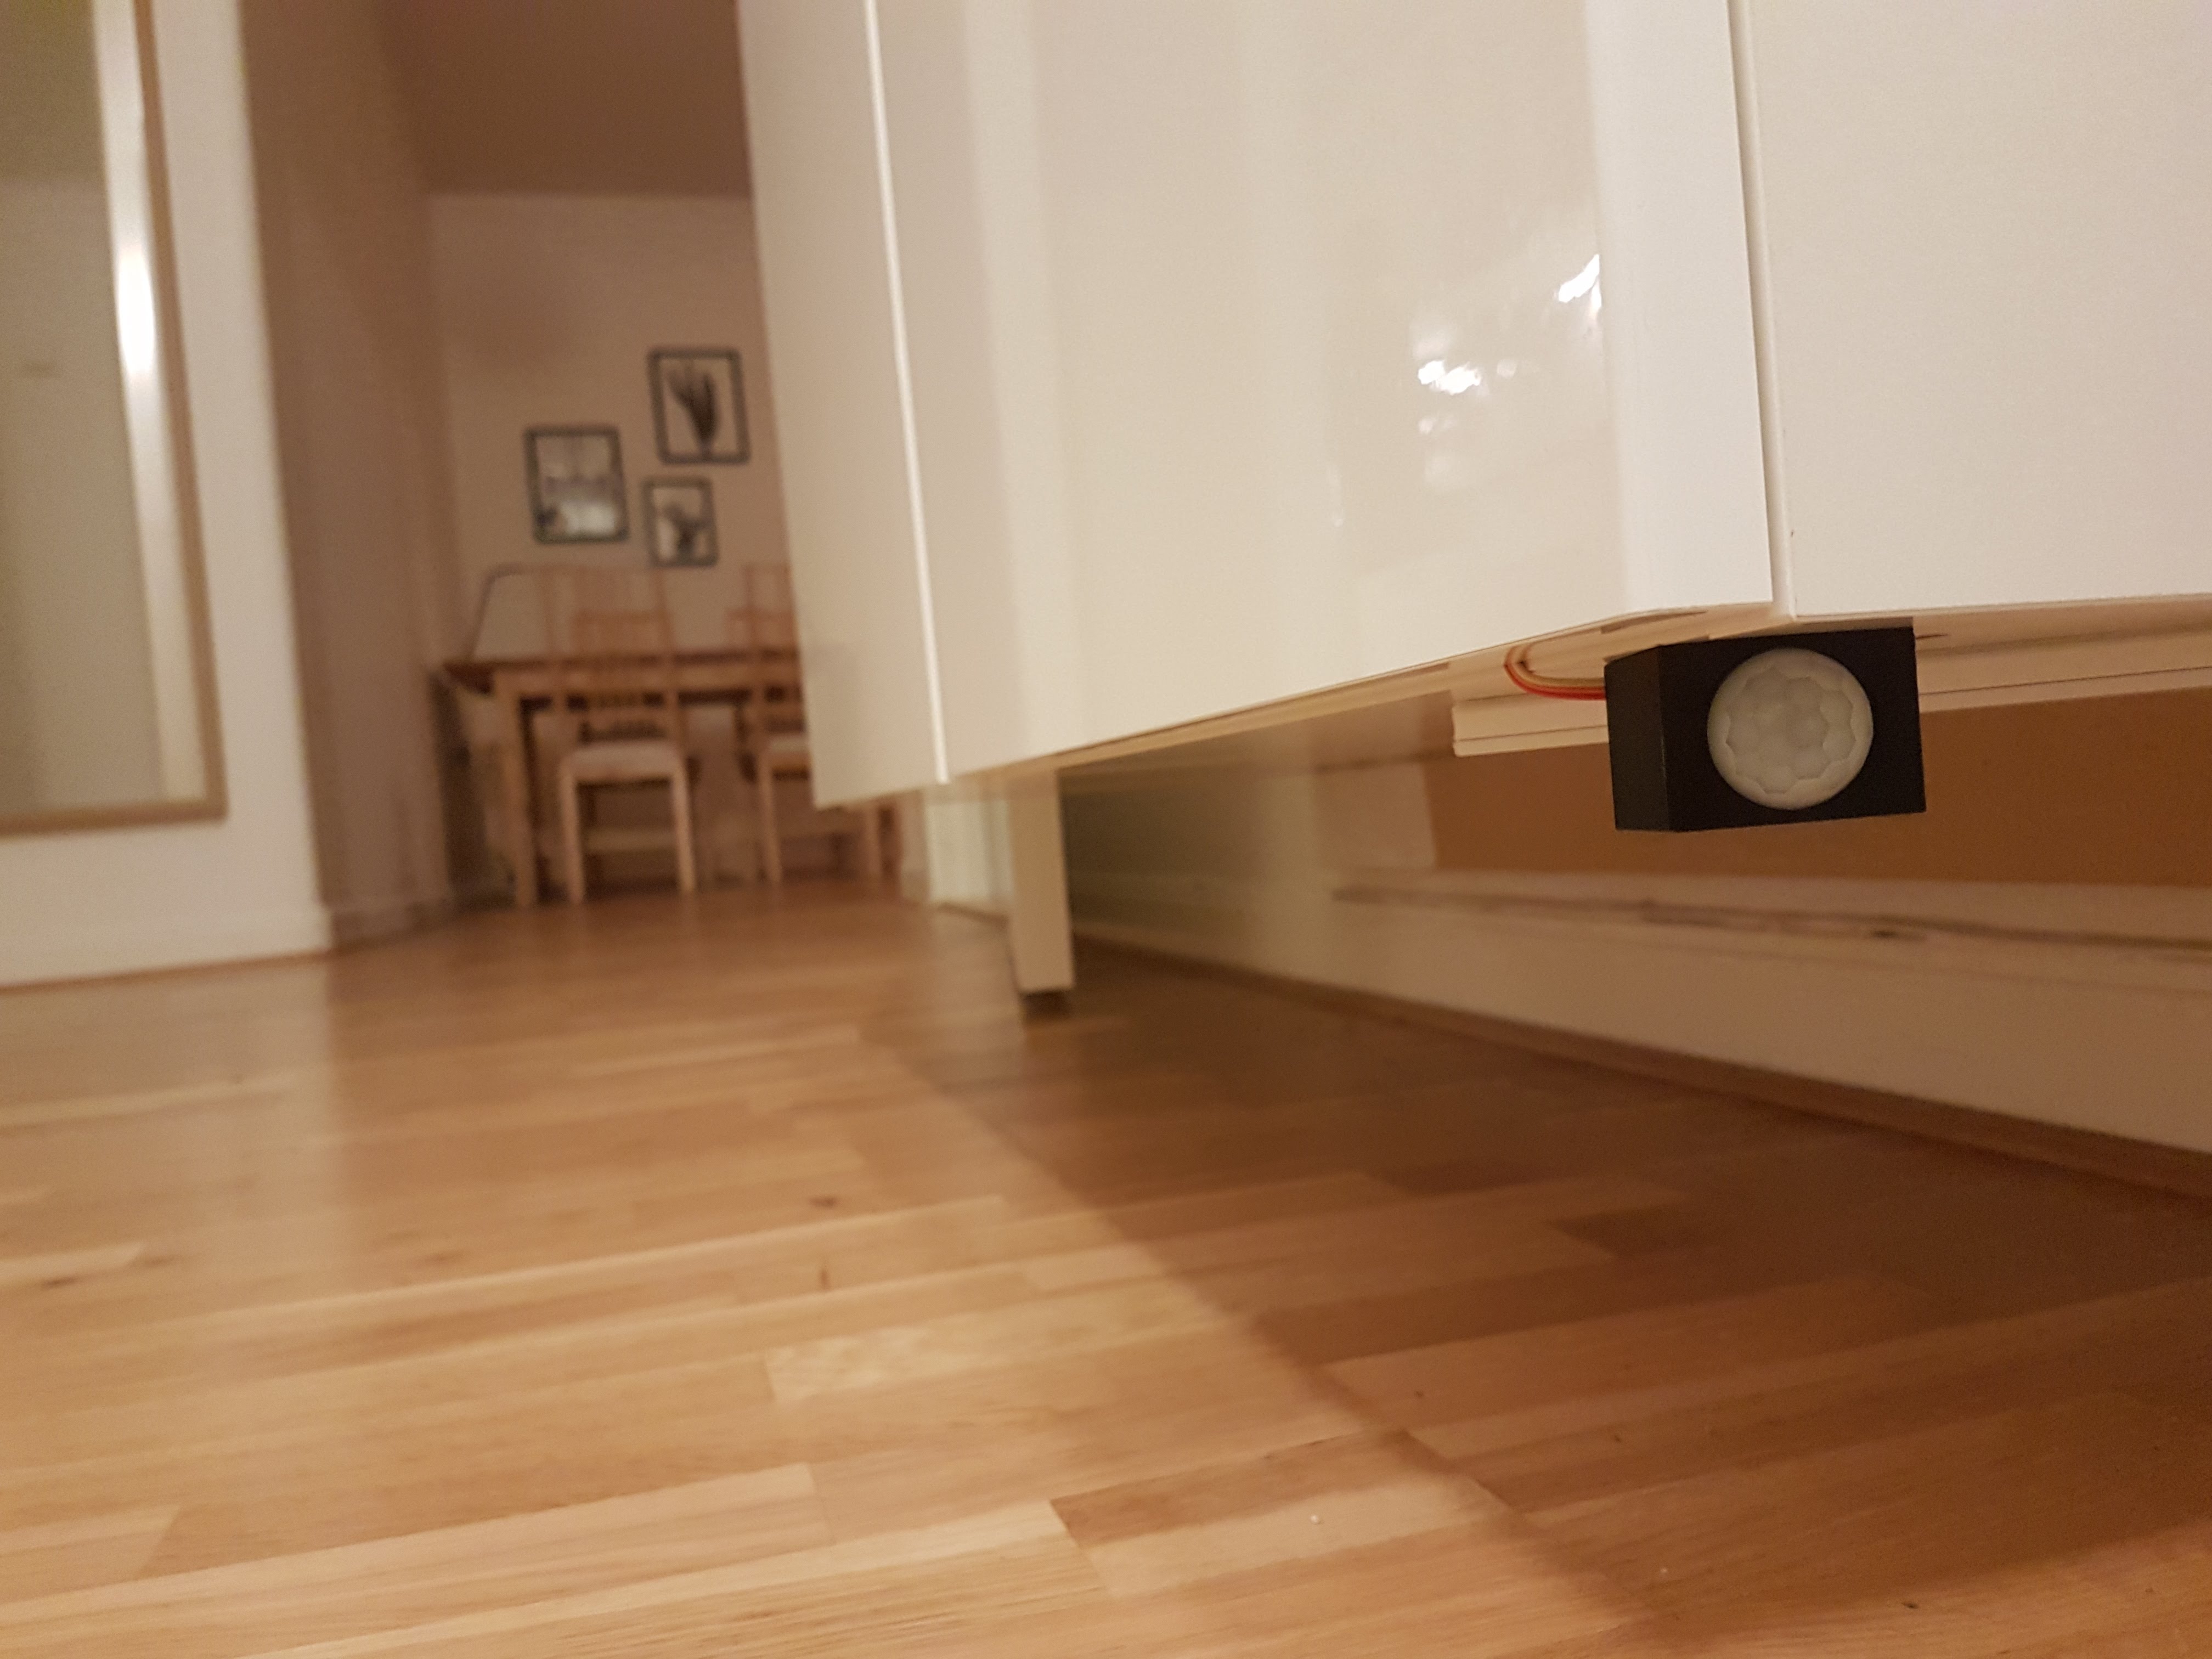
As a first solo project, I decided to build something simple but useful. I have a set of Philips Hue lights at home. One of them is located in the hall, and I though it would be nice to turn it on automatically when someone enters home or is in the entrance getting ready to leave.
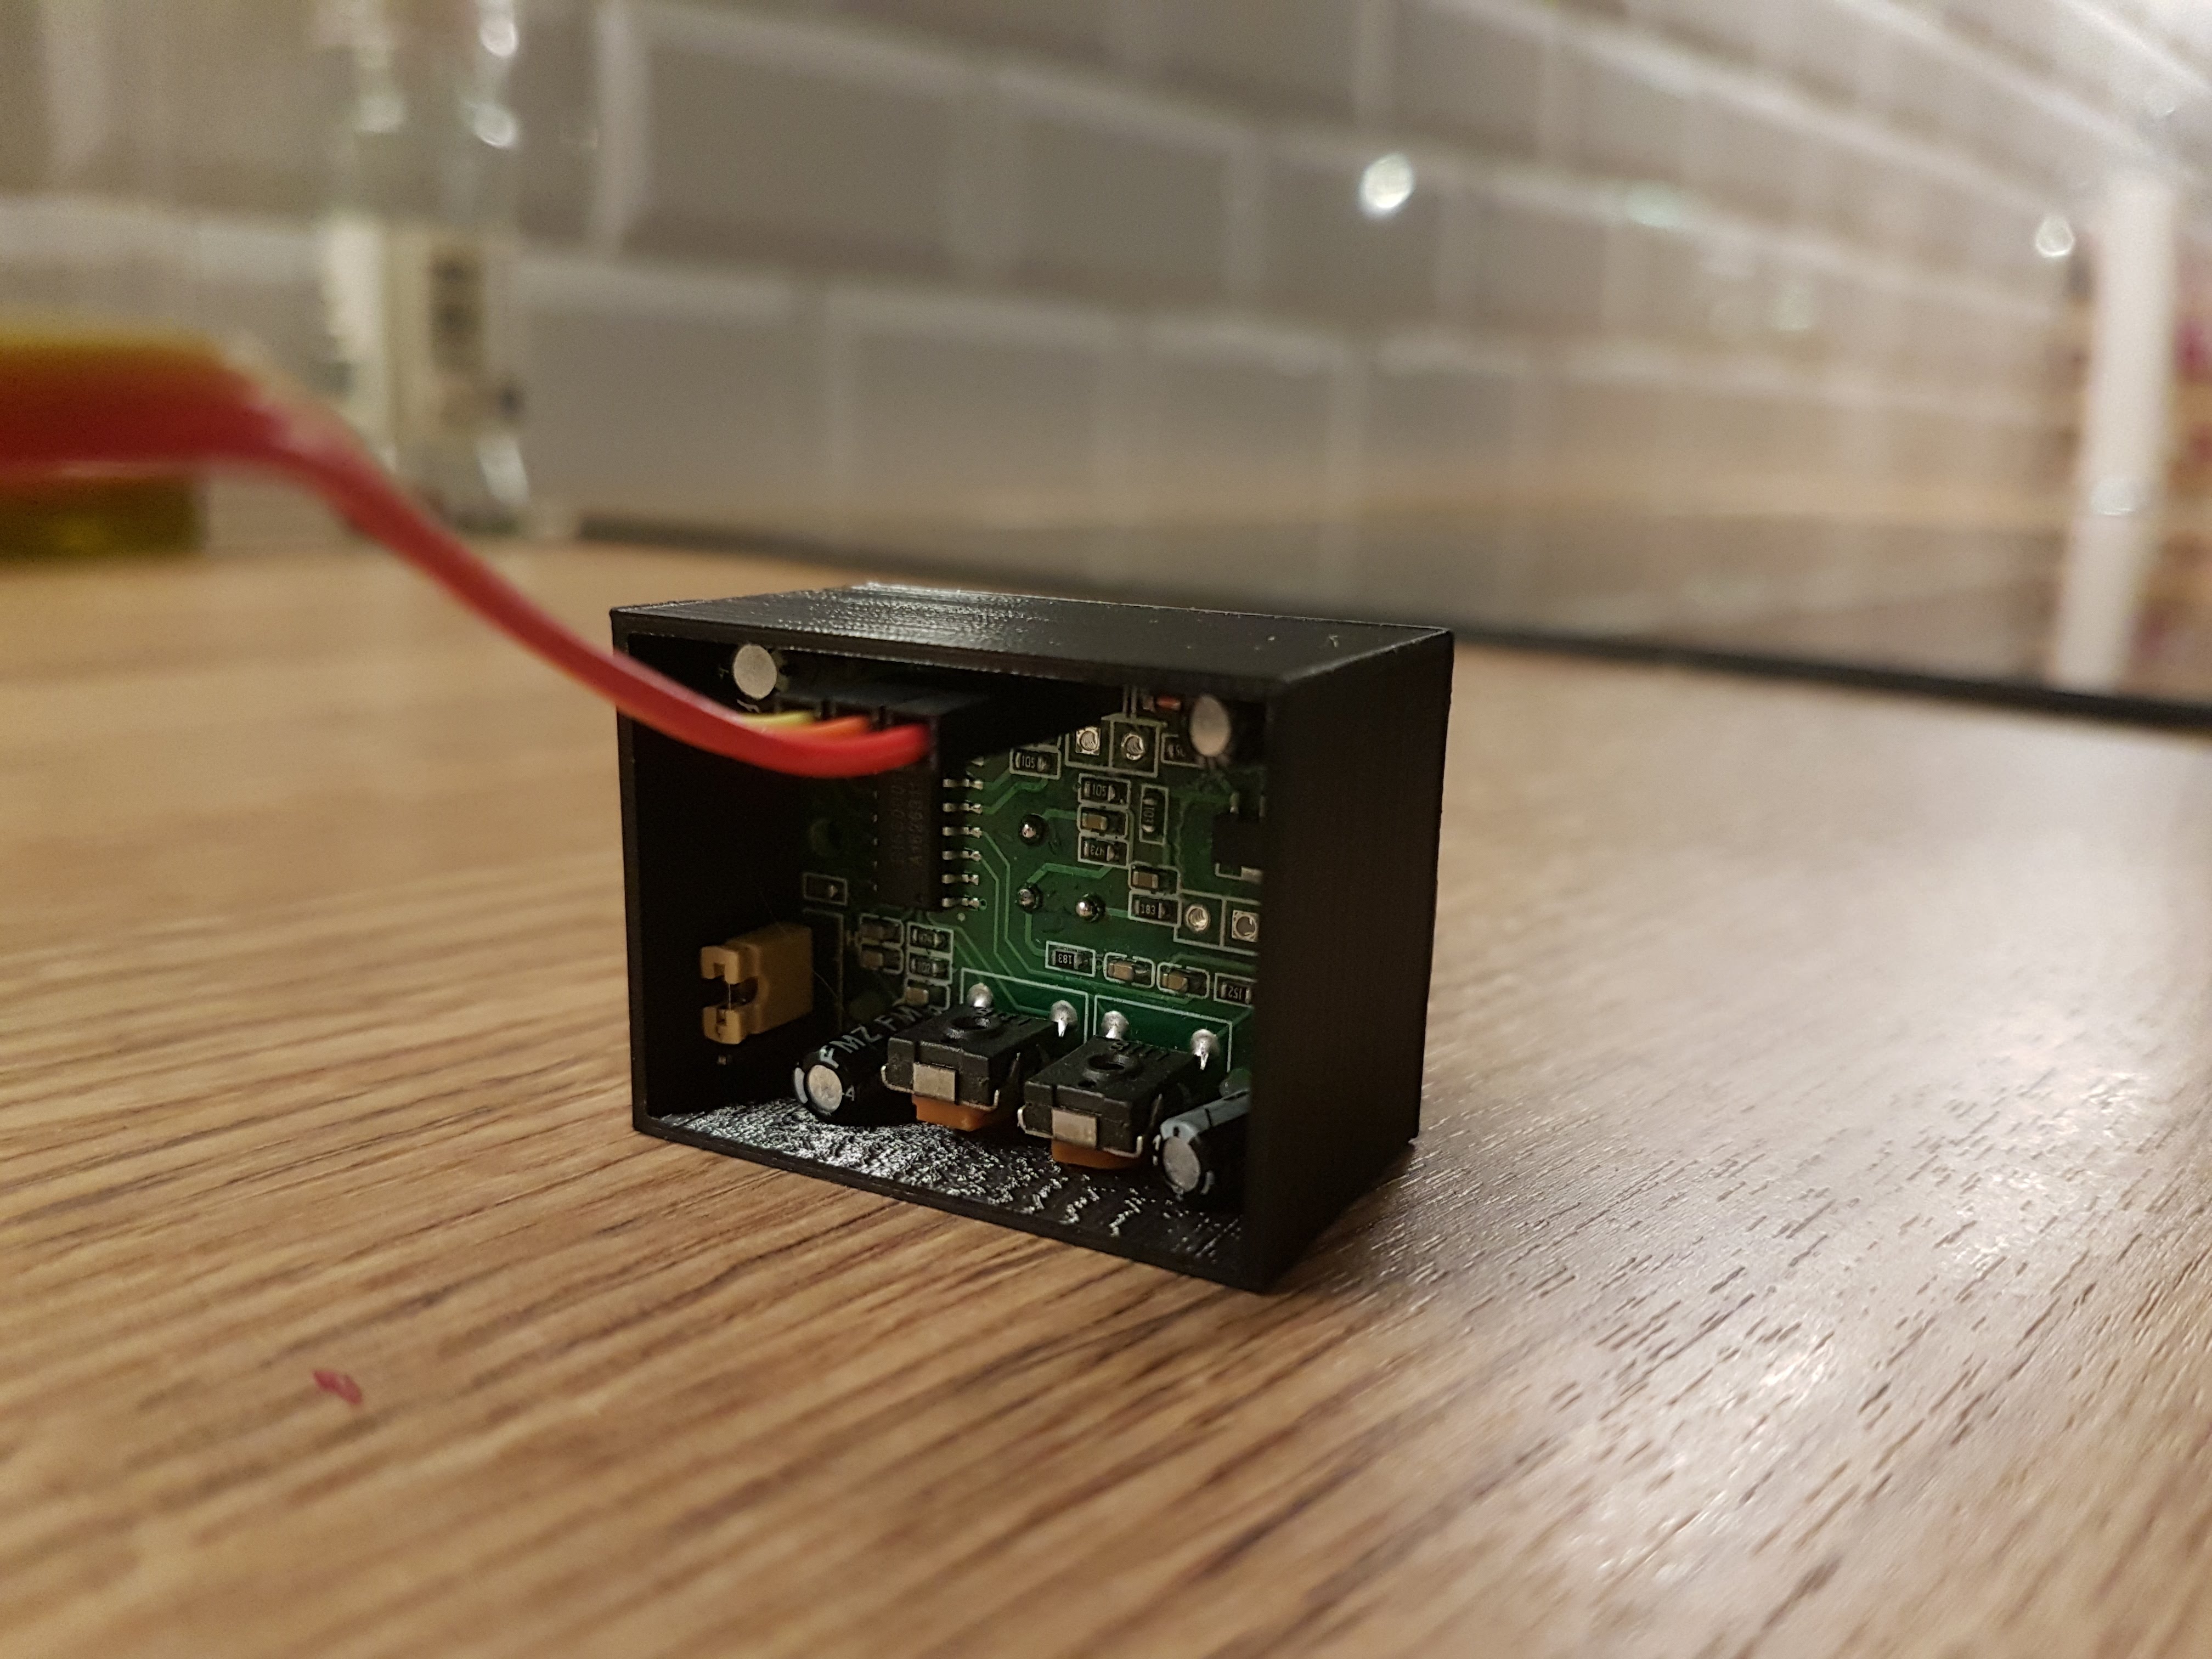
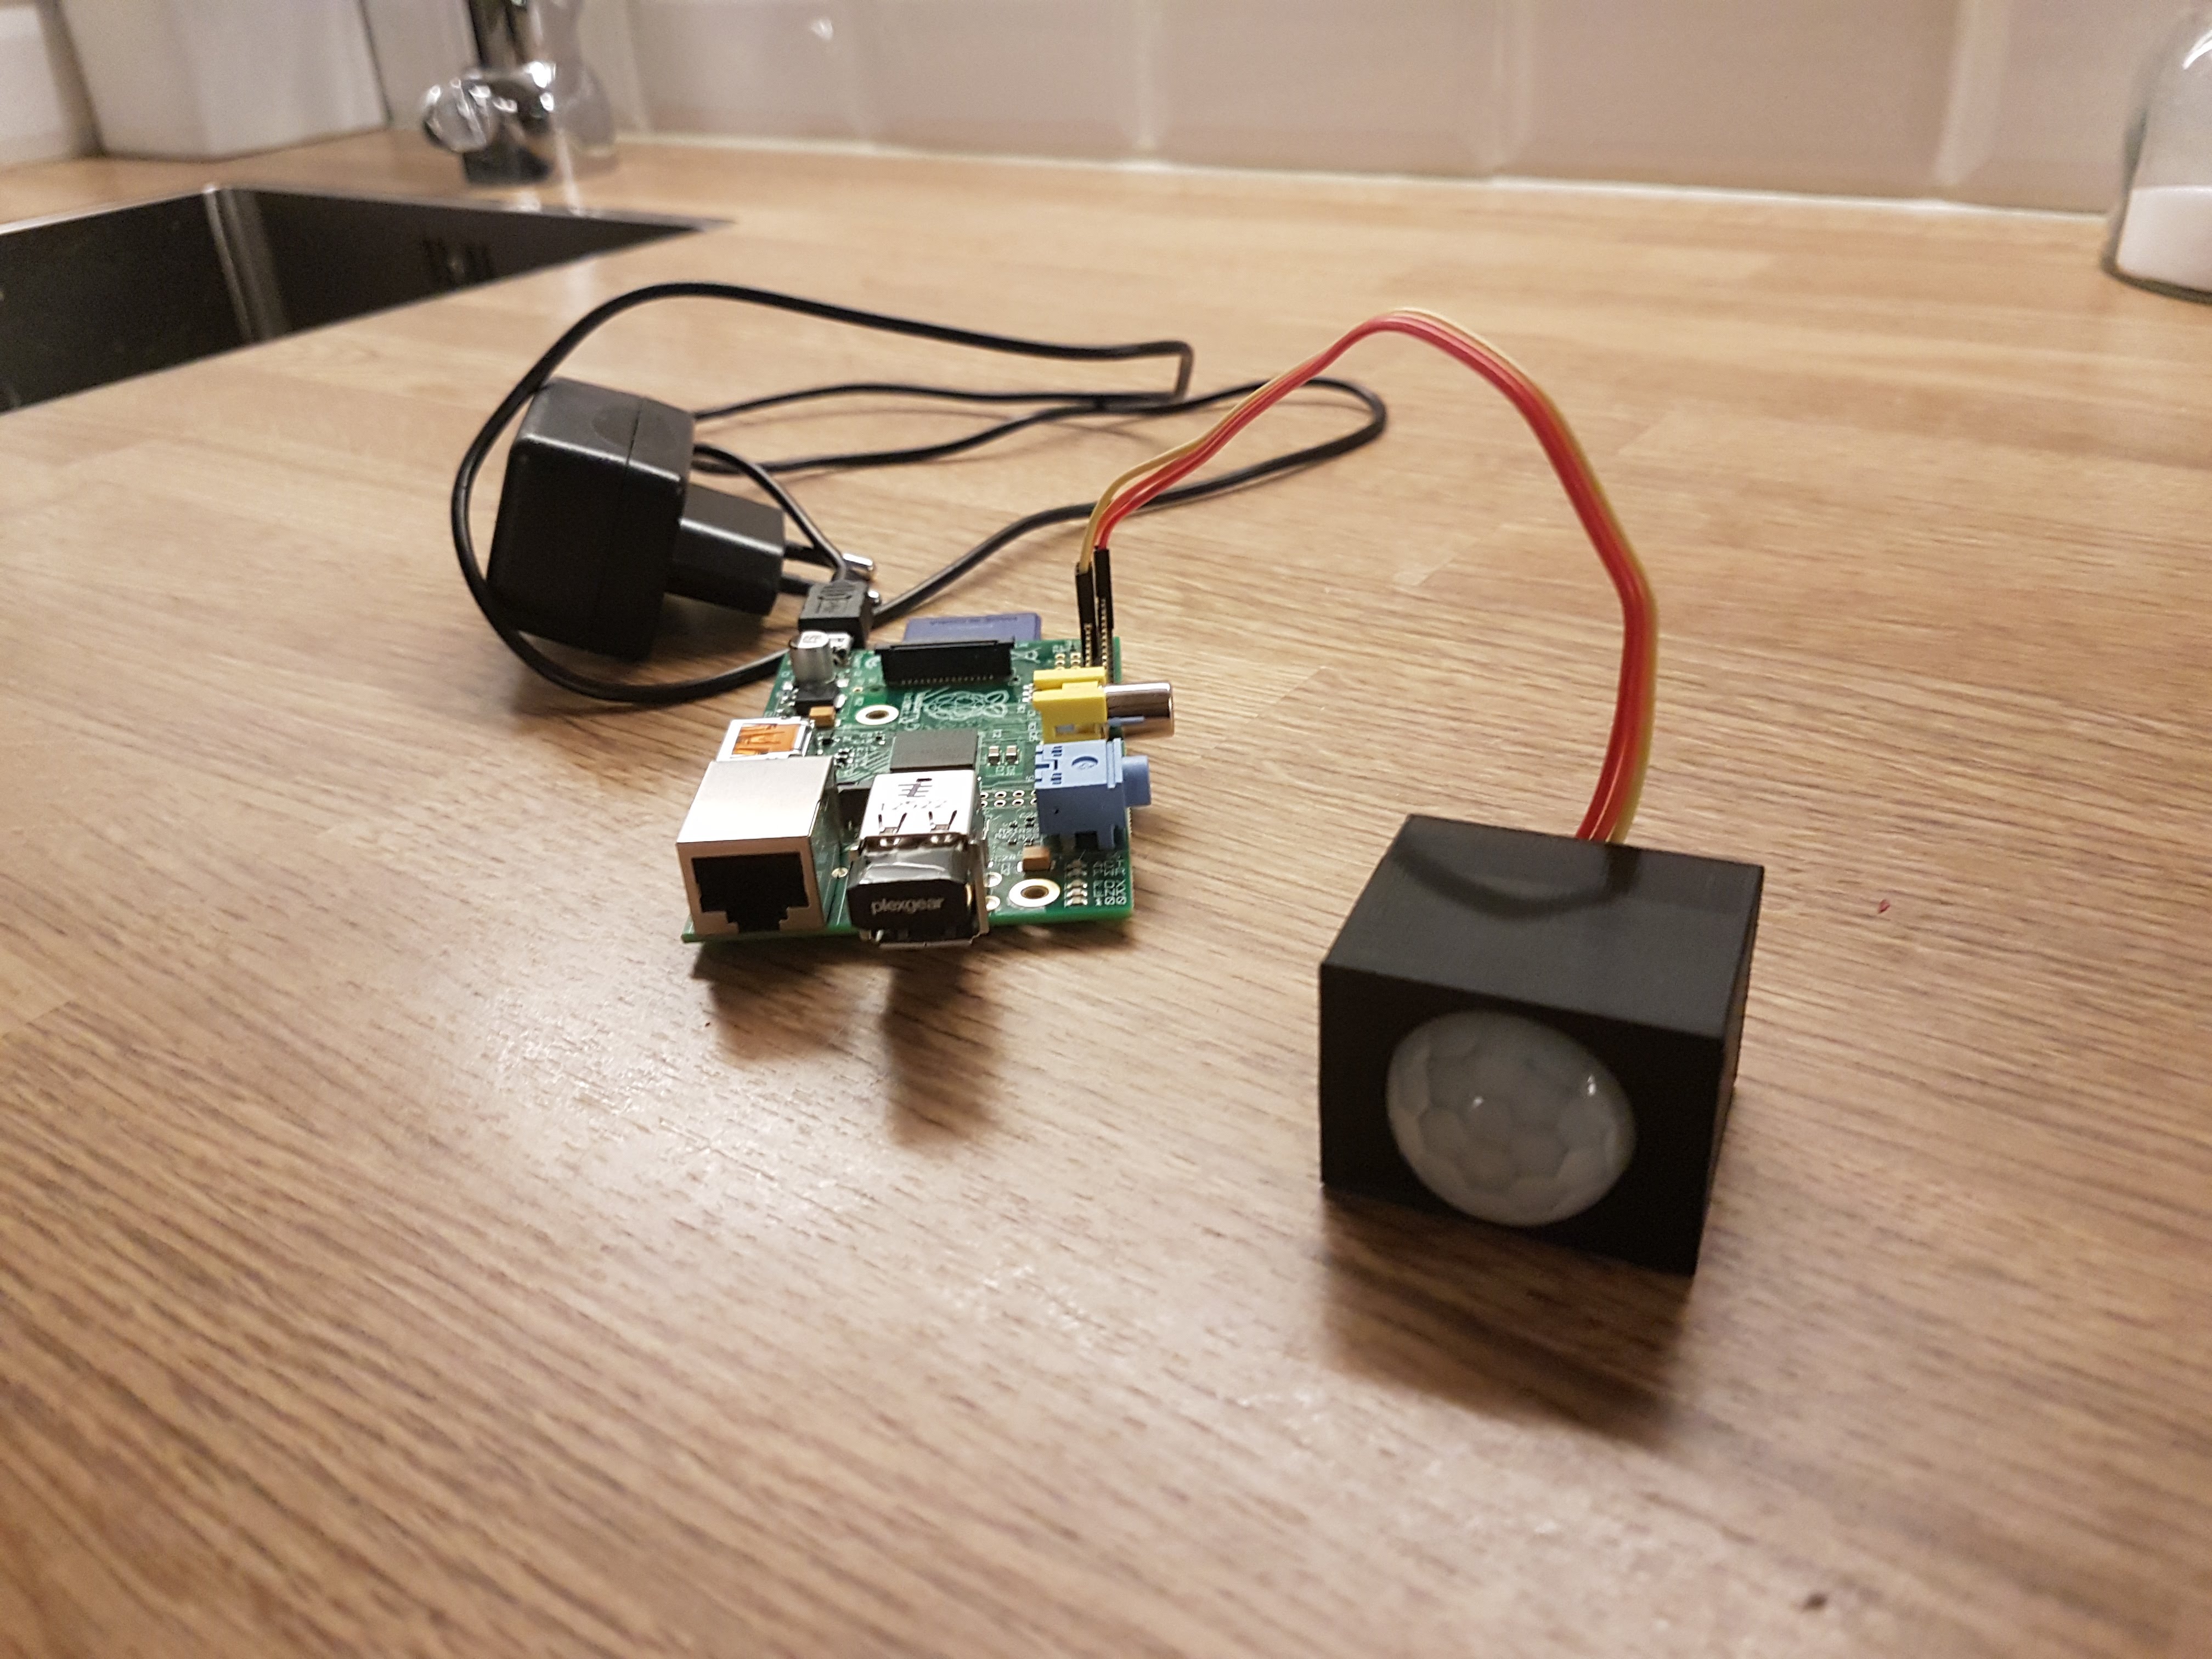
I rescued an old Raspberry Pi I bought in 2013 that has been collecting dust since then. The only extra piece of hardware I needed for this was a PIR motion sensor.
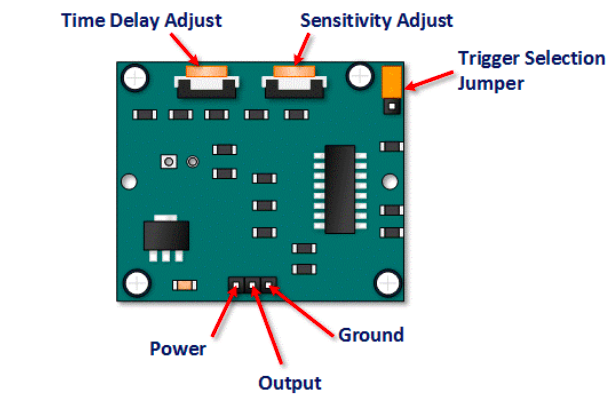
A Passive Infrared Sensor (PIR sensor) is an electronic sensor that measures infrared (IR) light radiating from objects in its field of view. It is a very simple yet interesting sensor, since there are many variables that can affect its behaviour. This is a schema of a general PIR sensor.
If you’re interested on the details, I highly recommend you to read through this pages about how PIR sensors work (DO IT!).
For this project, just because I wanted to understand the different modes of the sensor, I decided to control the delay time via hardware.
To start testing, I connected the PIR sensor to the RPi and started observing the outputs. I decided that what I needed was “Repeatable trigger” mode. This is, whenever it detects movement, the delay time will restart. With this setting and slightly manipulating the time delay screw, the sensor will emit “True” whenever there is movement. It will do this until about one minute after the last movement is detected.
The connections to the Raspberry Pi are very simple. Depending on the model the GPIO pins may change, but you only need power, ground and a free digital pin to be configured as input.
The code running on the Pi only needs to read the sensor’s input continuously and turn on/off the lights accordingly. Philips Hue has a really nice and simple API that eases this task.
Here you can find the code I used in this project.
Also, if by any change you have access to a 3D printer, I designed a small box to hold and protect the sensor. Find it here.
Result
For being that simple, it’s amazing how well it works ![]() . Here you can find a bunch of pictures and a video of the process. Hope this post is motivating, go and build!
. Here you can find a bunch of pictures and a video of the process. Hope this post is motivating, go and build!